Overview
This simple jig makes it easy to route a series of parallel slots, with the adjustable guide bar accurately controlling the slot spacing. ToolQuest created this jig to streamline the milling of WoodAnchor™ fixturing grids, but it's also suitable for making uniformly spaced dados in shelving units.
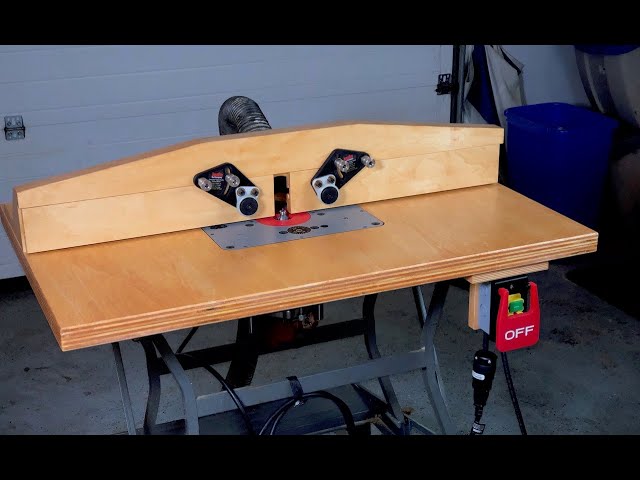
The jig base replaces the base plate of your router, and its size and mass provide exceptional stability while routing. WoodAnchor sliding nuts and button-head screws fasten the guide bar to the two fixturing slots in the jig base.
How it works
When milling the first of a series of parallel slots, the guide bar runs against a reference edge of the workpiece, just like an an ordinary router edge guide. Then for each successive slot, the guide bar slides in the previous slot. In order to slide freely, the guide bar must be slightly narrower than the slot. So for maximum slot-spacing accuracy, run the guide bar against the side of the guide slot that is closest to the router bit.
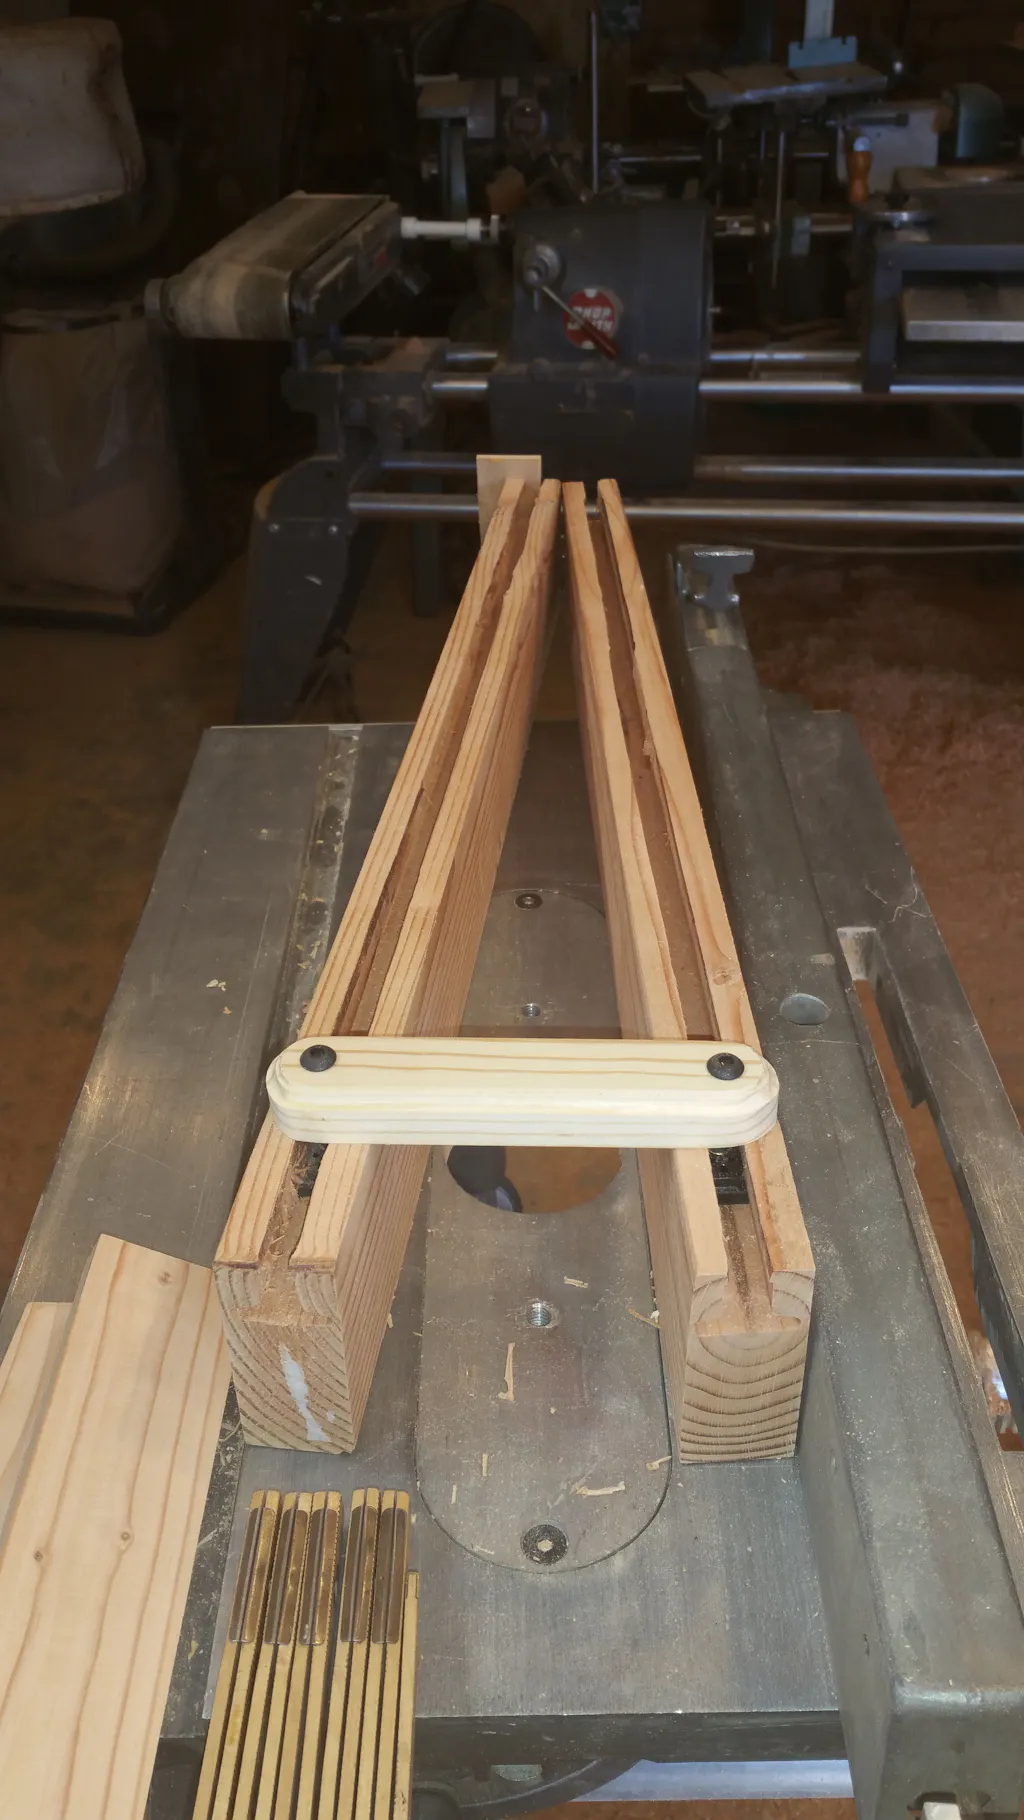
Any error in the slot spacing will accumulate with each successive slot, so it's best to adjust the guide bar position as precisely as possible. You can use any measuring device you wish, but we've found that it's exceptionally quick and easy to set the guide bar position with setup blocks. Simply place them against the router-bit cutter, slide the guide bar into contact, and then lock it down. The angle of the guide bar is not critical.
The photo above was taken while preparing to mill a WoodAnchor fixturing grid. We wanted a 4" grid spacing with a 1/2" router bit, so we needed 3-1/2" between the router bit and the guide bar. Combining a 3" setup block with a 1/2" block quickly gave us the desired spacing. After milling the grid, the measured spacing error was only 0.010" per slot.
The 1/4"-20 mounting screws limit the guide bar width to a minimum of about 1/2", so slots cut with this jig must be at least 1/2" wide. For wider slots, you can make a wider guide bar, or you can simply use the 1/2" guide bar as an edge guide, even when running it within a slot.
The jig-base dimensions shown in ToolQuest's free plans allow slot spacing of up to 8". If you need larger spacings, simply increase the length of the base.
Downloads
Summary build notes
Jig base
3/4" MDF is a good choice for the jig base, as it is flat, dense, and inexpensive. Cut a rectangular workpiece to the desired size, and mill the two WoodAnchor fixturing slots along its sides. The router-bit clearance hole can be created easily with either a Forstner bit or a hole saw.
Use the base plate from your router as a template for the router mounting holes. Center it on the router-bit clearance hole, and then transfer the mounting-hole locations to the jig base. Using a small Forstner bit, make counterbores of an appropriate diameter and depth for router-base mounting screws and washers. (Note that you may need longer mounting screws, in order to maintain adequate material thickness beneath the screw head.) Finally, drill mounting-screw clearance holes all the way through the jig base.
To ensure that the jig base doesn't catch on workpiece edges or slots, round over the edges of all features on the bottom side of the jig base, including the fixturing slots. A bearing-piloted roundover bit makes short work of this operation.
A coat or two of film finish on the jig base toughens the surface and improves wear resistance. We used spray shellac on the one pictured.
Guide bar
The guide bar can be made of any straight-grained hardwood, or of metal if you're so inclined. Just remember that it will have to be slightly narrower than any slot that it runs in. For the jig shown, we milled the guide bar to 0.490" wide, for use with a 1/2" router bit.
The mounting screws will compress hardwood guide bars slightly, causing the sides to bulge outward next to the screw heads. To avoid binding at these points, sand slight reliefs into the sides of the guide bar, directly alongside the screw heads. These need only be few thousandths of an inch deep, and their shape is not critical.
Assembly
Apply a coat of silicone-free paste wax to the sides of the guide bar and to the bottom of the jig base, so that they can slide easily while routing.
Assemble the mounting screws and sliding nuts to the guide bar.
Mount the router and the guide-bar assembly to the jig base.